March 13, 2026

Basement Remodeling Seattle Plans For Better Home Functionality

A finished basement can expand a Seattle home’s usable square footage by up to 30%, which surprises many homeowners. It also helps recover a substantial portion of the investment when the home is sold. This makes basement remodeling in Seattle a wise choice for families needing more space or looking to earn rental income.

View details about Home Remodeling Seattle

Learn more about Basement Remodeling Seattle WA

Explore more about Home Remodeling Kirkland WA

Imagine transforming your basement into a cozy family room, a private guest suite, or a home office. A thoughtfully planned seattle basement renovation can convert unused square footage into space you use every day. Many projects are finished within 4–8 weeks. Still, projects that include bathrooms or bedrooms often take longer and cost more.

Partnering with seasoned professionals helps the project move forward smoothly. Professional basement remodel seattle contractors carefully inspect for water issues, ceiling height, egress windows, and utility access. This ensures the finished space is safe, attractive, and durable.

Before starting, consider both your personal needs and the resale value. Selecting the right basement remodeling services seattle can help you add features such as a bathroom, wet bar, or extra bedroom without going over budget.

Basement Remodeling In Seattle

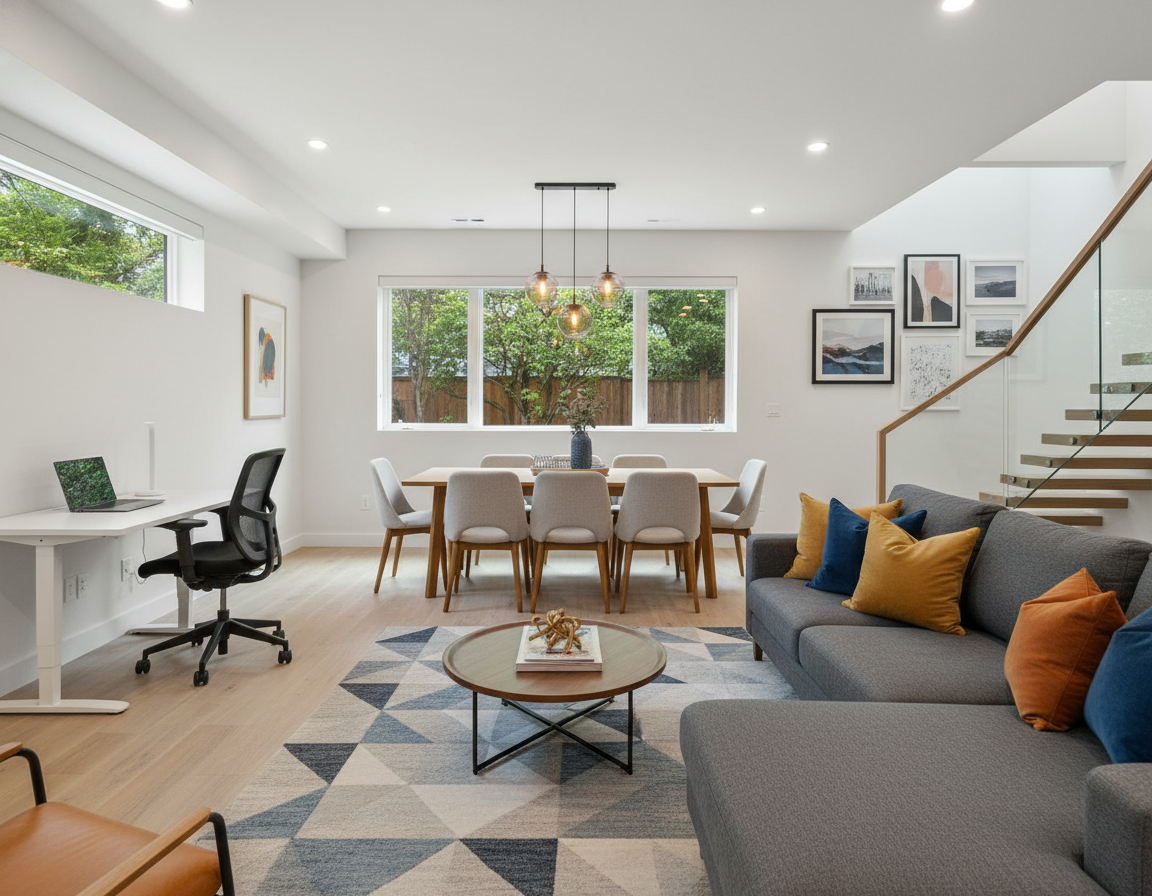
Converting a gloomy, underused basement into an inviting living space is a sensible choice for Seattle homeowners. A finished basement creates more living area without expanding the home’s footprint. It can also improve resale value and produce rental income when planned properly. Many locals seek a legal bedroom, a full bathroom, and a compact kitchen or wet bar.

Experts in basement renovation in Seattle stress the value of a thorough assessment. It is important to inspect for moisture, confirm proper drainage, and identify structural or mechanical constraints. Addressing these issues early helps avoid delays and keeps the project on track. Most full-trade remodels generally take four to eight weeks.

Basement remodeling is highly appealing in Seattle due to the city’s urban lots. It lets homeowners gain extra space without changing the yard or street-facing appearance. Features like improved insulation, vapor barriers, and energy-efficient lighting make the space more comfortable and appealing during Seattle’s rainy months.

When searching for the best basement remodelers in Seattle, look for those with experience in obtaining permits and adhering to local codes. Experienced crews take care of framing, plumbing, and electrical work and make sure inspections are properly scheduled. That approach helps prevent surprises and ensures the finished space meets rental or resale standards.

A successful renovation can convert storage or mechanical areas into family rooms, home offices, or rental suites. Selecting the right fixtures, durable flooring, and moisture control strategies ensures the space is usable throughout the year. Experts recommend using proven materials and ventilation to extend the life of finishes.

Project Step Local Focus Typical Timeframe
Initial assessment Moisture, foundation, and mechanical layout 1–3 days
Permit & design Local Seattle code review for egress and plumbing 1–3 weeks
Rough trades Framing, plumbing, electrical, and HVAC adjustments 1–3 weeks
Finishes Fixtures, insulation, drywall, and flooring 1–2 weeks
Final inspections Bedrooms and bathrooms code compliance 1–2 days

Basement Remodeling Seattle WA

Planning Your Seattle Basement Renovation: Assessments And Goals

A carefully considered plan is essential for a successful remodel. Begin with a detailed assessment of the space. Then establish goals that fit your needs and budget. Early decisions significantly impact the outcome, affecting both livability and resale value.

Initial Site Assessment Essentials

Check for water stains, mold, and cracks in the foundation before the design phase begins. Also evaluate ceiling height, existing windows, and egress access. Confirm that the basement can satisfy code requirements for bedrooms or rental units.

Map out where the HVAC, plumbing, and electrical lines are located. Find all load-bearing walls and support posts so the layout can be planned safely. Take note of any slope or drainage concerns that may affect moisture control.

Setting Clear Project Goals And Scope

Determine the main purpose of the space: a bedroom, full suite, family room, home gym, or mixed-use area. Prioritize essentials like egress windows for sleeping areas, durable materials for damp climates, and proper ventilation.

Try to balance features you will enjoy daily with those that also support resale. Working with experienced Seattle contractors can help refine the project scope and provide realistic pricing expectations.

Budgeting And Seattle Basement Remodel Cost Expectations

A successful basement remodel starts with a well-defined budget and realistic cost expectations. Basement projects can vary from simple rec rooms to complete suites that include a bedroom and bathroom. Knowing the main cost factors helps homeowners make choices that stay within their budget.

Typical Cost Drivers For Basement Remodels

The size and scope of the remodel have a major impact on cost. Including a full bathroom and bedroom raises both labor and material costs. High-end finishes, custom millwork, and built-in cabinetry also raise costs.

Concealed problems can change the overall budget. Structural repairs, moisture control work, and improved drainage add extra costs. Electrical and plumbing relocations also increase both time and labor.

Features play a role. Popular Seattle upgrades such as wet bars, kitchenettes, soundproofing, and specialty lighting tend to increase costs. A finished basement can add value, although ROI depends on local demand and the quality of the work.

Budget Planning Tips And Contingencies

Tiered pricing can help set clear expectations. Set up basic, mid-range, and premium budgets so you can compare choices. Affordable results are often possible when homeowners choose sturdy, budget-friendly finishes.

Make sure every line item is included in the estimate. Labor, materials, flooring, windows, electrical, plumbing, drywall, paint, fixtures, tile, millwork, and a 2-year construction warranty should be listed. Add design fees of about 6%–8% and a buffer for sales tax, permit fees, and appliances.

Always plan for contingencies. Set aside approximately 20% of the budget to cover unforeseen work and schedule delays. A fixed-price contract with a clearly detailed scope is often the safest approach. Design-build firms and top basement contractors seattle often provide pricing guides and permit assistance.

Price Tier Typical Range Common Features When to Choose
Basic $15,000 – $35,000 Open recreation space, basic flooring, simple lighting, no full bathroom Cost-conscious updates or rental-ready spaces
Mid-range $35,000 – $80,000 Completed rooms, better flooring, full bath, light millwork Homeowners adding living space with good finishes
High-end $80,000+ Premium finishes, custom cabinetry, structural modifications, kitchenette Luxury suites or extensive reconfigurations

Complete remodels typically take about 4–8 weeks. Projects that include a bathroom and bedroom generally start at around $50,000 or more, depending on scope. Many contractors in Seattle offer free consultations to refine estimates and plan for permits.

Reviewing bids from at least three respected firms can help identify fair pricing and practical trade-offs. Look for detailed scopes from top basement contractors seattle and prioritize firms with transparent estimates to minimize surprises.

Design And Material Choices For Durable Seattle Basements

Opting for the right materials is key to creating a basement that’s both functional and durable in Seattle’s humid climate. A strong design plan needs to balance moisture control, comfort, and easy maintenance. These considerations safeguard your investment and ensure the space remains healthy throughout the year.

Flooring Options Suited To Damp Climates

Luxury vinyl plank remains one of the best options for basements with moisture concerns. It is water-resistant, easy to clean, and offers the look of wood.

Porcelain and ceramic tile are also durable, moisture-resistant choices for wet bars and bathrooms. Concrete, finished over a moisture barrier, offers a modern, sturdy choice that can be sealed or stained for aesthetic appeal.

Traditional hardwood is not recommended unless elevated subfloors and robust moisture control are installed. Matching flooring to use and traffic ensures a professional remodel in Seattle delivers lasting results.

Wall, Insulation, And Ventilation Strategies

Moisture-resistant drywall or cement board should be used in high-risk areas to reduce mold risk. These materials can be combined with mineral wool or closed-cell spray foam insulation to improve thermal performance and sound control.

Good ventilation is critical in Seattle basements. Mechanical options such as dehumidifiers, air exchangers, and energy-recovery ventilators help control humidity. Simple window fans can also be effective when conditions permit.

Heating solutions include extending the central HVAC system, installing ductless mini-splits, using wall-mounted electric heaters, or adding hot-water baseboards. Durable bathroom fixtures and solid-wood cabinetry with strong joinery and hardware also enhance longevity under humid conditions.

Working with experienced teams helps ensure materials fit both the budget and the climate. Choose basement remodeling services in Seattle that can offer tailored plans and affordable finishing while maintaining quality. The right contractor will translate those material selections into a stylish, practical basement finished to professional standards.

Hiring Top Basement Contractors And Remodelers In Seattle

Choosing the right team is essential for a successful basement remodel. Look for contractors with Seattle experience, clear timelines, and straightforward pricing. A design-build firm can simplify communication, cut down on delays, and manage permits and inspections on your behalf.

What To Look For In A Professional Basement Remodel Team

Ensure the contractors are licensed, insured, and have a local project history. Request references from Seattle-area jobs and recent portfolios featuring moisture-resistant finishes and efficient layouts. Opt for teams that manage all trades and offer a fixed-price contract with a detailed scope of work.

Choose contractors who clearly explain permit timelines and inspection requirements for Seattle and King County. Look for firms with published warranty policies and reputable brands for materials. That approach helps reduce risk and protect your investment.

Questions To Ask Prospective Contractors

Use a set of questions when interviewing contractors. Be sure to ask if they handle Seattle permits and inspections, offer fixed-price contracts, and what their usual timeline and warranty policy look like.

Ask for a detailed breakdown of labor, materials, and contingencies. Request references from recent projects and examples showing how they handled damp or uneven basements. Make sure you know the primary contact person and how change orders will be handled.

Selection Factor What to Request Why it Matters
Experience with Seattle basements Portfolio, neighborhood references, recent project photos Demonstrates familiarity with local code, soil, and moisture control
Permitting and inspections Permit fee estimate, written permit plan, inspection timeline Ensures compliance and avoids costly rework
Contract and pricing Detailed scope, fixed-price contract, payment schedule Reduces surprises and clarifies responsibilities
Project management Assigned project manager, communication plan, weekly updates Helps keep the project on track and improves coordination
Warranty and post-completion support Written warranty terms, contact for warranty service Helps protect against defects and later issues
Reputation and reviews Better Business Bureau, online reviews, trade references Shows consistent quality and customer service

Seattle homeowners often compare the best basement remodelers seattle and the top basement contractors seattle to find the right fit. Talk with seattle basement renovation experts for a consultation and ask for a detailed estimate and schedule before making your decision.

Value-Adding Features And Layout Ideas For Seattle Basements

Transforming a neglected cellar into a vibrant, income-generating area is achievable with strategic upgrades. When design elements match the upper levels, the whole home feels more cohesive. Seattle homeowners often work with professionals to meet code requirements, improve comfort, and raise resale value.

Adding a legal bedroom with an egress window can greatly expand livable space while meeting safety standards. Including a full bathroom on the same level improves the property’s appeal and boosts rental potential.

Installing a wet bar or kitchenette can elevate the space for both entertainment and tenant convenience. Premium finishes such as luxury vinyl plank or engineered hardwood, paired with custom millwork, can significantly improve the property’s perceived value.

Built-in cabinets, efficient lighting, and smart storage solutions can help declutter the area and give it a finished look. Basement remodeling in Seattle often centers on these value-adding details because they can improve return on investment.

Popular layout concepts

A guest suite with a private bathroom is ideal for families and short-term rentals, appealing to those seeking flexibility. Buyers looking for flexible living arrangements often prefer this layout.

Open media or family rooms with a wet bar can create a welcoming space for entertaining. Zoned lighting and acoustic treatments can give the room a more cinematic atmosphere.

A private gym or home office should include dedicated ventilation and bright work lighting. Planning the electrical and plumbing layout thoughtfully during the remodel can help avoid costly later adjustments.

Feature Benefit Typical Cost Range
Egress window and legal bedroom Creates safe livable space; supports rental or ADU options $3,000 – $8,000
Full bathroom Adds functionality and rental appeal $10,000 – $25,000
Wet bar / kitchenette Improves entertaining and tenant convenience $5,000 – $15,000
High-quality flooring & finishes Improves durability and perceived value in damp climates $4,000 – $12,000
Custom storage & millwork Enhances organization and visual appeal $2,500 – $9,000

Work with top basement renovation teams in Seattle to ensure your project aligns with zoning rules. A careful plan helps ensure insulation, framing, electrical, and plumbing work are completed on time. The right permits and expert guidance help make the space safe, comfortable, and ready to use.

Project Timeline, Permitting, And Quality Assurance For Seattle Remodels

Begin with a realistic timeline for your basement remodel in Seattle. Most projects take 4–8 weeks. Larger remodels or projects that add bathrooms and bedrooms may take longer. Weather, material lead times, permit processing, and hidden issues like structural repairs or moisture can all cause delays.

Permit processing is a critical part of the overall schedule. Seattle often requires permits for major changes such as adding bathrooms or bedrooms. This process can add days or weeks. Many homeowners choose design-build firms or experienced contractors to manage permits and inspections. It’s wise to include permit fees and inspection milestones in your budget to avoid surprises.

Quality assurance matters throughout the entire project. Verify that all systems, from plumbing to egress windows, meet Seattle code requirements. Top contractors often offer warranties, staged inspections, and fixed-price contracts with clear scopes. A two-year construction warranty is common. The final walkthrough is important for verifying workmanship and ensuring code compliance.

Choose companies that offer full basement remodeling services, including project management and warranty-backed work. Detailed completion punch lists, documented inspections, and clear schedules all help safeguard the investment. Renovate Builders, for instance, offers tailored services for Seattle homes, including permit handling and warranty-backed project delivery.

Why a 3/4 Compression Fitting is a Plumbing Standard

Ever ponder if a 3/4″ copper compression union can seal leaks more quickly than soldering or push-fit repairs? This brief introduction highlights the 3/4″ Copper Compression Union as a reliable, contractor-grade plumbing connector. It works well for both DIY homeowners and professional plumbers. This union delivers a quick solution, frequently avoiding the need for a torch, dedicated solder, or prolonged downtime.

Check out 3 4 Inch Compression Fitting
Its design is straightforward, featuring a nut and ferrule to create a tight, leak-proof seal on copper tubing. This simplicity makes it a preferred choice, stocked by wholesalers like Installation Parts Supply for same-day shipping on urgent jobs.

The following sections explain how the 3/4″ copper compression union works. They will also compare its strengths against brass and push-fit options while outlining step-by-step guidance for a strong, long-lasting connection.

What Is A 3/4″ Copper Compression Union And How It Works

The 3/4 inch copper union is a simple copper pipe fitting that joins two pipe ends of the same nominal size without soldering. It consists of a union body, two nuts, and ferrules. This design works especially well for repairs, accessible joints, and installations where soldering heat cannot be used.

What a compression union means

A compression union creates a removable mechanical joint by compressing ferrules onto pipe ends as the nuts are tightened. Those ferrules lightly deform and bite into the pipe outer diameter to create a tight seal against the union body. This fitting is often used by plumbers for quick replacements and easy-to-service connections in supply lines.

How the compression mechanism forms a leak-proof connection

When each nut is turned, the ferrule is driven inward. The ferrule squeezes uniformly around the pipe and seats into the union body. When aligned correctly and tightened to the proper torque, it forms a leak-proof connection suitable for potable water. If it is under-tightened, seepage may occur, but if it is over-tightened, the ferrule can deform and compromise the seal.

Why copper is used: durability and corrosion resistance

Copper’s natural corrosion resistance and dimensional stability give the 3/4 inch copper union long service life. Copper fittings generally resist wear under typical water conditions better than many plastics and some metals. This dependable performance is one reason copper is favored for durable, long-term plumbing repairs.

Feature 3/4 inch copper union Common alternative
Construction material Copper material Plastic or brass
Seal method Ferrule compression for a tight, leak-proof connection Push-fit or soldered joints
Ease of service Serviceable and removable Push-fit can be removable, while soldered joints are permanent
Corrosion resistance High level Varies; brass good, some plastics inert
Typical uses Quick fixes, line transitions, and accessible joints Extended runs and hidden soldered connections

Copper Compression Union

Why Choose A Copper Pipe Fitting For Repairs

When selecting plumbing repair parts, the choice matters greatly for long-term performance. Copper pipe fittings stand out because of their strength and proven lifespan in both potable water and HVAC systems. A high-quality copper compression union ensures a durable joint, capable of withstanding mechanical stress and routine maintenance.

Copper union durability versus brass and plastic alternatives

Copper unions boast superior mechanical strength and resist deformation under torque. In contrast to brass compression couplings from brands like Thrifco Plumbing, copper is more compatible with copper pipes. Plastic push-fit couplings, while quick to install, lack the heat resistance and long-term durability of copper, especially in high-use or high-temperature settings.

Corrosion-resistant union for dependable long-term service

Copper resists many of the common forms of corrosion found in potable water systems. When properly installed and paired with compatible metals, a corrosion-resistant union helps reduce the risk of pinhole leaks and mineral attack. Routine inspections and proper water chemistry are important for helping the fitting deliver a long service life as a dependable plumbing repair part.

Where copper compression unions are commonly preferred

Copper compression unions are the go-to for residential potable water lines, HVAC supply and return lines, and commercial projects where durability is paramount. They work especially well where future service or disassembly is expected, which benefits both contractors and homeowners. Distributors like Installation Parts Supply offer contractor-grade copper unions for these common applications.

Material, Size, And Compatibility Considerations

When choosing a plumbing connector, both material and size are critical. Copper unions are widely recognized for resisting corrosion and maintaining a clean look. Before installation, it is important to verify whether the fitting is sized by nominal pipe size or outside diameter.

3/4 inch copper union size details matters greatly, especially when IPS or OD standards must be considered. A typical 3/4 inch copper union matches 3/4″ IPS, but copper tube is sold according to OD. Always review product specifications and measure the tube OD to avoid mismatches, especially in tight spaces.

Compression fitting compatibility may vary by manufacturer and fitting pattern. Many compression unions work with hard copper tubing. For PEX or CPVC systems, approved adapter fittings from the piping material’s manufacturer should be used to preserve warranty coverage and code compliance.

The best choice between a compression fitting, a soldered joint, and a push-fit connection will depend on the job requirements. Compression fittings are especially useful for quick repairs, removable joints, or situations where heat cannot be used. Soldered connections are best for permanent, tamper-resistant seals in concealed installations. Push-fit fittings provide tool-free installation, but they may have limits related to pressure, temperature, and long-term durability.

Prior to purchase, make sure the fitting is either short pattern or standard pattern to ensure proper clearance. Measure the nut and ferrule stack, and check whether the product lists compatibility as a specific combination, such as a brass coupling for IPS versus copper OD. This helps prevent unnecessary return trips and reorders.

Factor Compression Union Soldered Joint Push-Fit
Installation speed Fast, with limited tools More time-consuming, torch required Very fast, no tools needed
Can it be removed? Removable Permanent connection Removable on some models
Best use Repair work and areas where heat is restricted Hidden permanent lines Fast installs, temporary use, or approved applications
Compatibility Copper tubing, plus adapters for PEX/CPVC Mostly copper and brass Varies by manufacturer, with some support for PEX and copper
Sizing notes Verify 3/4 inch copper union sizing (IPS versus OD) Match the tube OD and wall thickness Use the manufacturer’s sizing chart

Step-By-Step Installation Guide For An Easy Installation Fitting

Use this straightforward install guide to fit a 3/4″ copper compression union confidently. The instructions below explain the tools, preparation, assembly, torque guidance, and leak inspection needed for a dependable plumbing connector installation. Parts can be sourced from Installation Parts Supply or local plumbing wholesalers for contractor-grade quality and same-day pickup where available.

Tools and prep

Gather two adjustable wrenches or one wrench and an adjustable spanner, a tube cutter, a deburring tool or file, and a torque wrench if you want precise tightening. Order ferrules, nuts, and the union body from Installation Parts Supply or a nearby plumbing wholesale distributor to ensure compatibility with your job. Have a clean rag and a flashlight nearby.

How to prepare pipe ends and components

Use the tube cutter to make a square cut on the copper pipe. Remove burrs and sharp edges with the deburring tool so the ferrule can seat evenly. Clean oxidation, paint, and debris from the pipe OD. First slide the nut onto the pipe with the threaded end toward the union, then add the ferrule in the correct direction before inserting the pipe into the union body.

Compression union installation assembly

Insert the pipe completely into the union until it reaches the stop. Start by hand-tightening the nuts on both sides. Hold the union body with the adjustable wrenches and tighten the nut carefully. For most fittings the guideline is the specified number of turns past finger-tight provided by the manufacturer or a torque value if supplied.

Torque guidance and common mistakes to avoid

Do not overtighten; excessive force can deform the ferrule or pipe and lead to leaks. If you have a torque wrench, apply the manufacturer’s recommended torque. If no torque is specified, tighten incrementally: wrench one to one-and-a-quarter turns past finger-tight, then test under pressure. Recheck the connection after the first pressurization.

Leak checking and final steps

Turn the water pressure back on and inspect the joint for visible weeps. Use a dry cloth or paper towel to detect slow leaks around the compression fitting. If a small weep appears, tighten the connection slightly. If the leak persists, relieve system pressure and disassemble the joint to inspect or replace the ferrule and nut before reassembling.

Step Action Tip
1 Gather tools from Installation Parts Supply or local wholesaler Pick contractor-grade ferrules and nuts for longer service life
2 Square-cut the pipe and remove burrs Clean the OD for a proper ferrule seal
3 Slide nut then ferrule onto pipe Orient ferrule per manufacturer guidance
Step 4 Insert the pipe fully into the 3/4″ copper compression union and hand-tighten Begin with even hand-tightening on both nuts
Five Wrench tighten to specified turns or torque Avoid overtightening to prevent deformation
6 Restore pressure and inspect the joint for leaks A towel helps detect slow weeps; always relieve pressure before taking the joint apart

Common Troubleshooting And Quick Connect Fix Tips

Small leaks at a compression joint often appear as a steady drip at the nut or slight weeping after the system is pressurized. First verify the line pressure is off and the area is dry. Inspect the pipe end, nut, and ferrule for obvious damage before assuming the fitting body is at fault.

How to identify and repair minor leaks

As a basic quick connect fix, tighten the nut according to the manufacturer’s recommended turns. If the leak persists, depressurize the line and take the joint apart. Examine the ferrule for cuts, flattening, or distortion, and also inspect the nut threads for wear. If the pipe end is damaged, re-cut and deburr it, then reassemble using a new ferrule and proper torque to restore a leak-proof connection.

When ferrules or the whole compression fitting should be replaced

Replace ferrules when they show visible deformation or cuts from installation. If the nut, fitting body, or threads are corroded, stripped, or cracked, replace the entire compression union. Repeated leaks at the same joint suggest a material or alignment issue; consider a higher-grade contractor fitting from a reputable supplier or switching to a soldered joint for a more permanent leak-proof connection.

Preventive maintenance and avoiding overtightening and misalignment

During first assembly, avoid overtightening. Begin by hand, then finish with the recommended torque or the specified turns past finger-tight. Keep pipe ends aligned so the ferrule seats evenly and does not cut at an angle. Inspect the joints after installation and then inspect them again under service pressure. Routine checks reduce the need for compression fitting troubleshooting and help detect early wear before a leak develops.

Issue Likely Cause Quick Fix When to Replace
Drip at nut Minor ferrule seating issue or loose nut Retighten to manufacturer guidance, then retest under pressure Persistent drip after reassembly
Small leak after installation Debris, a poor cut, or pipe misalignment Depressurize the line, re-cut, deburr, and reseat the ferrule Ferrule is cut or distorted
Sudden leak under load Cracked nut or stripped threads Install a new nut and retest Replace the full fitting if the body or threads are damaged
Recurring leaks at one joint Poor alignment or the wrong fitting grade Realign the pipe and use the correct installation torque Use a better-grade fitting or switch to a soldered joint

Buying Guide: How To Select The Right Plumbing Connector From A Wholesale Distributor

Begin with the material specifications and certification details. Confirm that the plumbing connector is approved for potable water, backed by manufacturer certification, and offered with a contractor-grade warranty. Verify the pattern, whether short or standard, and confirm that ferrules and nuts are included. Matching the fitting to the pipe OD or IPS before purchase is crucial if you want to avoid returns.

Look for corrosion-resistant features and dependable brands like Mueller Industries, NIBCO, and Viega. A well-made copper union will often perform better than lower-cost options in corrosive conditions. Installation requirements and adapter compatibility should also be considered, particularly in mixed-material setups like copper-to-PEX.

Installation Parts Supply can speed up job-site procurement by stocking contractor-grade copper unions, ferrules, nuts, and matching adapters. They provide same-day shipping on in-stock items when time is critical. For bulk orders, contact their sales or customer support and cross-reference part numbers to ensure exact matches.

When evaluating value, consider the lifecycle cost, not just the initial price. Brass compression couplings, including those from Thrifco Plumbing, may look less expensive online. Even so, the decision should also account for longevity, corrosion resistance, and ongoing maintenance needs. Although a copper union may have a higher initial cost, it can offer lower lifetime costs in aggressive water conditions.

Be aware of manufacturer MAP policies that influence visible online discounts. Retailers may withhold advertised reductions until checkout, so request a final quote for accurate comparisons. Inquire about contractor pricing, returns, and warranty handling from wholesalers to uncover true value.

For a quick comparison, review this short checklist:

  • Potable water material certification
  • Whether ferrules, nuts, and adapters are included
  • Pipe OD/IPS compatibility
  • Brand reputation and contractor-grade quality
  • Final price after MAP, shipping, and warranties

Utilize this checklist when sourcing from Installation Parts Supply or your local wholesale distributor. This approach ensures you choose a plumbing connector that balances performance, durability, and cost for your project.

Safety, Codes, And Best Practices For Plumbers And DIY Users

Working on a 3/4″ copper compression union requires strict adherence to safety guidelines and knowledge of local regulations. Before any work begins, the necessary requirements should be verified. Even basic repairs should be handled carefully, particularly when regulated procedures must be followed.

U.S. local code considerations for compression fittings

In the U.S., different areas have their own rules for compression fittings. Many places permit these fittings on both cold and hot-water lines, provided they’re listed for safe use. However, some inspectors might limit certain ferrule types or demand brass components with specific certifications. Always check the local plumbing codes and what your inspector expects before installing a compression union.

Handling copper fittings safely around pressurized systems

Always ensure the line is depressurized and drained before loosening any nut. Wear protective eyewear and gloves resistant to cuts when cutting copper pipe. If you decide to solder rather than use compression fittings, have a fire shield and a Class B-C extinguisher ready. While compression fittings eliminate the need for heat, they still require a secure and neat assembly.

When a licensed plumber should be called instead of attempting DIY repair

For jobs involving gas piping, concealed or difficult-to-access lines, or multi-story risers, hiring a licensed plumber is the best option. They can ensure compliance with fitting codes, select the correct materials for safe use, and safely restore pressurized systems.

Situation DIY OK Call a Licensed Plumber
Accessible supply-line leak at a union Yes No, unless leak recurs
Work involving hidden walls or ceilings No Yes
Gas piping or combined mechanical systems No Yes, always
Unclear local code requirements for compression fittings No Yes
Replacing a basic plumbing repair part such as a ferrule or nut Yes, provided the correct tools are used Yes, if sealing fails after repair

Conclusion

The 3/4″ copper compression union is a durable plumbing connector that works well for a wide range of repair and joining tasks. Its corrosion-resistant copper body and a well-installed ferrule ensure a leak-proof connection. This result depends on preparing the pipe ends correctly and tightening the union to the proper torque.

Selecting a contractor-grade, easy installation fitting from trusted suppliers such as Installation Parts Supply supports dependable part quality. It also makes same-day shipping possible when time matters most. Before making a purchase, compare copper unions with brass compression couplings and push-fit alternatives. This comparison helps determine the best choice based on compatibility, longevity, and job requirements.

Be sure to comply with local codes and use the right tools for the installation. After pressurization, inspect the joints to verify a secure, leak-proof connection. If ferrules or fittings show wear, replace them. If the repair is beyond your comfort level or raises code concerns, it is best to call a licensed plumber. This helps keep the system safe and compliant.